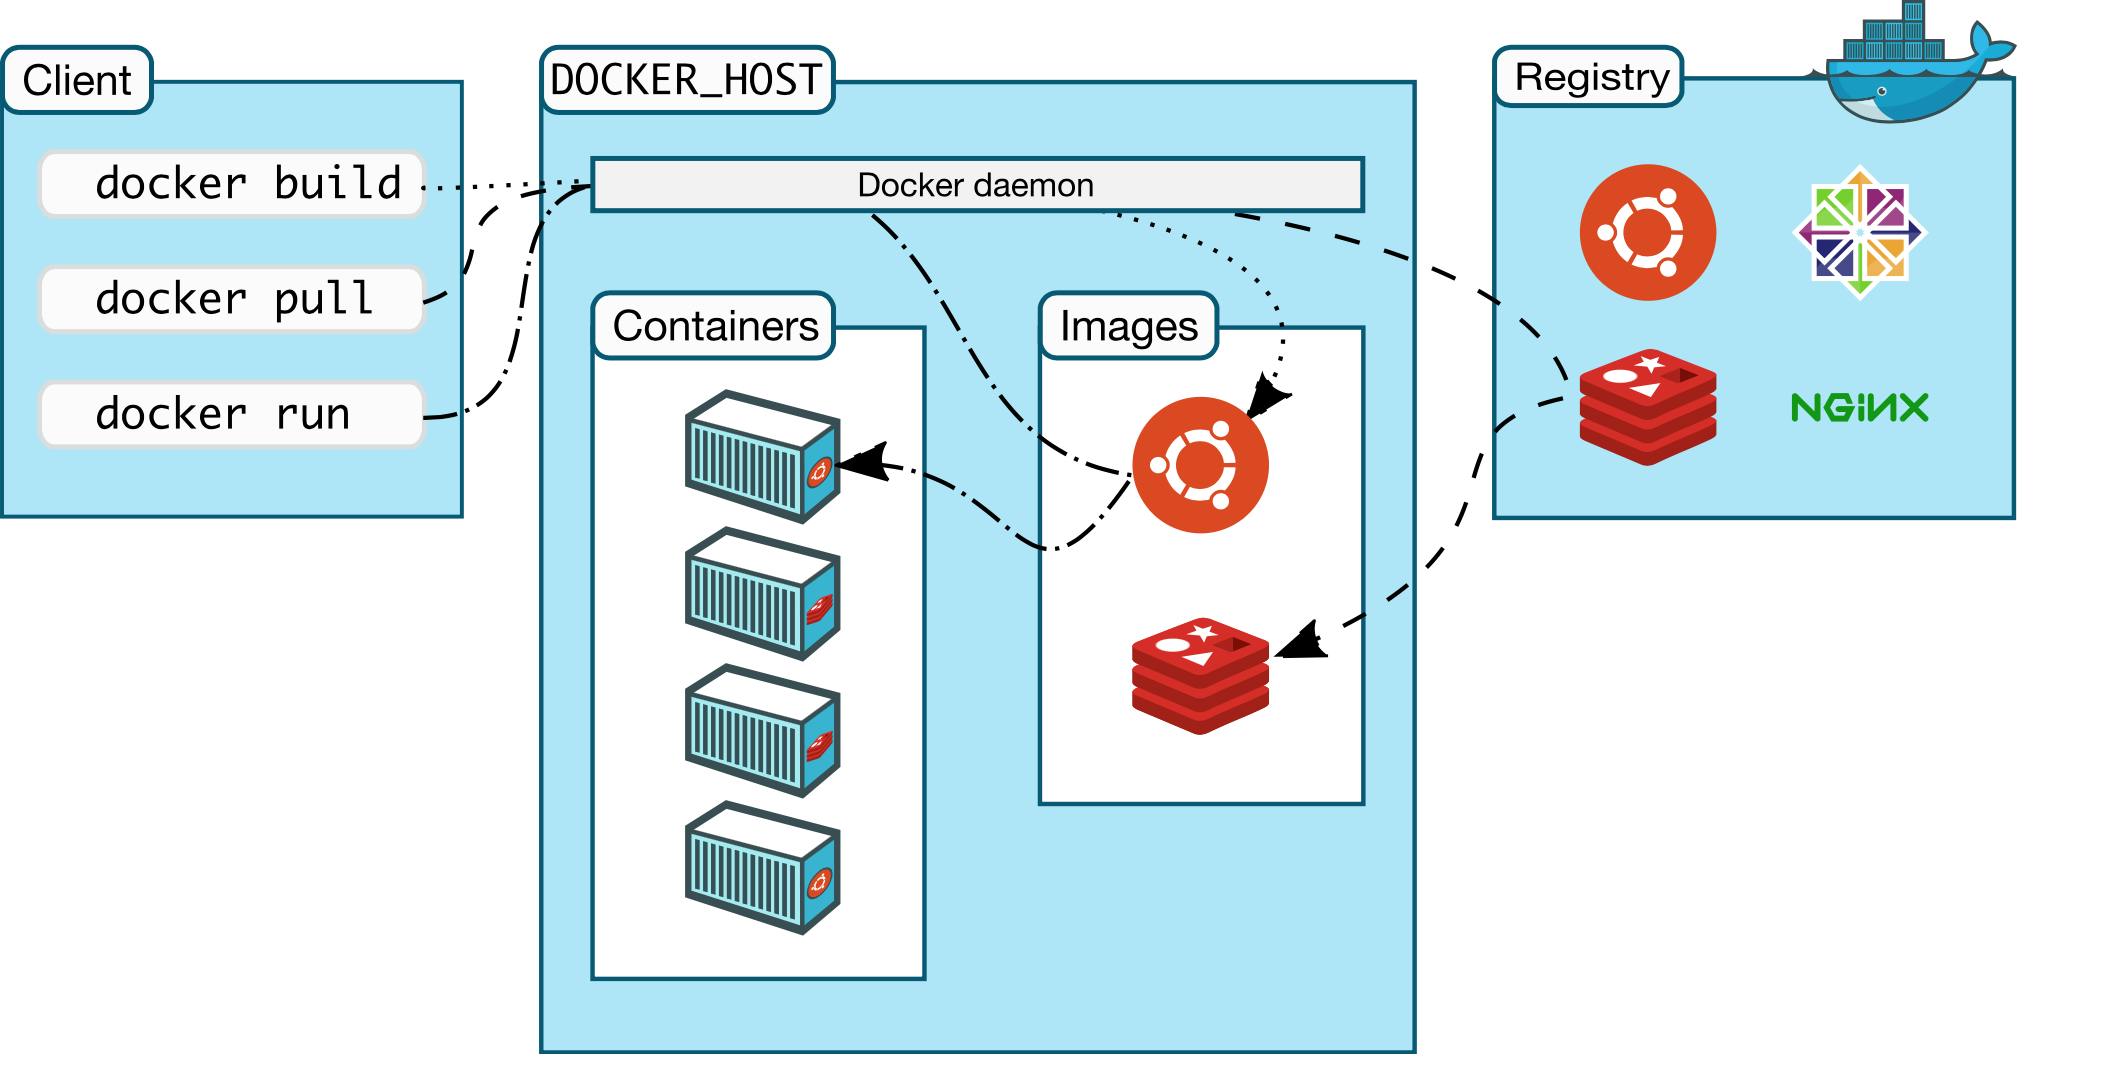
Advanced Docker [Docker Compose, Docker Run Flags, Docker Exec, Docker Hub, and Tips and Tricks]
Welcome Back!
In a previous article I built out this repo. The repo contains the source code for a simple Express server that returns <h2>Hi There!!!</h2> code. We're going to use the ending result here as our starter code for this project. I also covered the commands needed to build a Docker Image and spin up Docker Containers from that image.
If you're feeling a little rusty about those topics I'd recommend going back and checking out my last article on the topic. I'll be picking right up from where we left off in the last part.
In this article, we'll be covering Docker Compose, additional Docker Run flags, executing an interactive bash shell of your Docker Container with docker exec, and another neat Docker file that lets you see what files you are sending to the Docker Daemon (basically what files you are not Docker ignoring).
Quick Overview
Briefly
- Docker Compose is a way of automating deployments of Docker applications with a single command. As we've seen before, we used to have to repeat two Docker commands per Docker container we spin up (
docker buildto build an image anddocker runto run a container from an image). If we have multiple different Docker containers, like one for our frontend framework, one for our backend, and one for our database, that could be at least six different Docker commands we'd need to run in order to build it. This could all be done with a single command with Docker Compose. - Docker Exec is a way to execute commands on a running container.
- Docker Run is how you run Docker Containers from your Docker Images. There are a few additional flags besides -p that are useful when running containers.
- Docker Hub is a GitHub clone for Docker Images. With your account you can push and pull Docker Images from different devices like your server and your account.
Let's dive into each one of these separately.
Docker Compose
Building the Docker Compose
Docker Compose is amazing. This should get automatically installed with your original Docker installation, but if not they have guides here.
Docker Compose is a tool for creating and running multiple-container and multiple-image Docker applications. It's based on a YAML file that helps configure everything. It will automatically build up images and run containers for you. Let's take a look at how this works! With your current starter code create a docker-compose.yaml file.
In our first line, we'll have to specify the version of our Docker Compose. I recommend version 2.4 since that is the last version before update 3.0 which was Docker Swarm which reduced a lot of functionality. Do this with
version: '2.4'
Next up let's start listing out the instructions in docker-compose to run Docker applications running a service. We'll establish a services and create our first (and only) one calling it node-app with
services:
  node-app:
Now in our node-app service we'll specify our build instructions. To build we need to pass its context (basically a file path to the Dockerfile). We may also pass additional args that get passed to the Dockerfile like the NODE_ENV which we'll set to development here since we'll create a development container. This gets done with
    build:
      context: .
      args:
        NODE_ENV: development
Next we should pass the relevant ports which we used to specify with the -p flag in Docker Run. We'll use the binding of '4000:3000' which means that we expose port 4000 to the outside that calls on the Docker Container's exposed port 3000.
    ports:
      - '4000:3000'
Next we can overwrite the CMD ending in our Dockerfile. We'll pass a command to start the instance with command:, and the command we'll give is npm run dev which we'll specify in our package.json to be equal to node index.js. The docker-compose line is
command: npm run dev
So now our docker-compose.yaml file should look like
version: '2.4'
services:
  node-app:
    build:
      context: .
      args:
        NODE_ENV: development
    ports:
      - '4000:3000'
    command: npm run dev
And our modified "scripts" section in our package.json should now look like
  "scripts": {
    "test": "echo \"Error: no test specified\" && exit 1",
    "dev": "node index.js"
  },
Note: You don't really need the "test" section in the scripts, I was just too lazy to delete it
Running the Docker Compose
With Docker Compose we should be able to both build the relevant Docker Image AND run the Docker Container in one command. This is done with
sudo docker compose -f docker-compose.yaml up -d
- The
upkeyword is specifying that we are building up everything, so that's building up the image and running the container - Here the -f flag is specifying the file and -d is running everything in detached mode
Now if you go to localhost:4000 it should be running our <h2>Hi There!!!</h2> code.
If we run sudo docker images we can see that we created an advanced-express-docker_node-app image and if we run sudo docker ps we see that we have an advanced-express-docker_node-app-1 container running. To quickly delete all of our running containers from our docker-compose we will run
sudo docker compose down
The opposite of up is... you guessed it, down
Docker Exec
Docker Exec command executes commands on a running container. It follows a format of
sudo docker exec [OPTIONS] <container name> [CMD]
Here, the command I will be showcasing is actually being able to go into your container, basically ssh-ing into your container. This can be done by launching an interactive bash script. This command will be done with
sudo docker exec -it advanced-express-docker_node-app-1 bash
Here, we can ls, cd, and generally view files that are in here with cat and simply exit when we want to move back out.
Docker Run Flags
Docker Run is how you run a Docker Container from an image. There are a few additional flags that may prove to be useful when running these containers.
Note: These flags can all be set inside the docker-compose.yaml file as well
-v or --volume can be used as a way to sync your current directory with a directory on your Docker Container. There are different options you can pass with a volume binding.
One common option is :ro which specifies the volume binding to be read-only. This way if we make changes inside our Docker Container, like uploading files or deleting files, then these changes won't be reflected in our working directory (just in our Docker Container).
Note: If you wanted to just develop on your Docker Container and not even have node_modules installed on your local machine, deleting node_modules will also propagate to your Docker Container and you'll have node_modules deleted there as well which will break your application
We can modify our docker run command to be
sudo docker run -v "$(pwd):/app:ro" -p 4000:3000 -d --name node-express-container advanced-express-docker_node-app
Note the $(pwd) becomes %cd% if you are on Windows and ${pwd} if you're on Windows Powershell
To reflect the change in our docker-compose, we'll need to add an additional section (we can just place this under ports
    volumes:
      - ./:/app:ro
So now our most updated docker-compose file will look like
version: '2.4'
services:
  node-app:
    build:
      context: .
      args:
        NODE_ENV: development
    ports:
      - '4000:3000'

    volumes:
      - ./:/app:ro
    command: npm run dev
This volume binding is helpful if you are still developing your Docker Container. For example, let's go install nodemon as a dev dependency
npm i --save-dev nodemon
and modify our package.json. Specifically, let's change our "dev" script to be "nodemon index.js".
Now your package.json "scripts" should look like
  "scripts": {
    "test": "echo \"Error: no test specified\" && exit 1",
    "dev": "nodemon index.js"
  },
And, let's go rebuild our Docker Image through Docker Compose with
sudo docker compose -f docker-compose.yaml up -d --build
Notice here that we are passing an additional --build flag to force a rebuild and not just simply recreating a container. Now if we go back to localhost:4000 after rebuilding, we should see <h2>Hi There!!!</h2>.
We can go into our index.js file, go to line 5 and change the number of exclamation marks from three ! to one !
Save this file and go to your localhost:4000. Refresh the screen and it should update from <h2>Hi There!!!</h2> to <h2>Hi There!</h2>. That's because the local update of the number of ! was propagated to the container with the volume binding. Then, because you were running the server with Nodemon, Nodemon detected the file change and reran with the updated message.
That's volume binding.
--platform allows you to run your Docker Container in a different platform than what your device natively runs. As shown from this StackOverflow post it seems to be useful for M1 Macs trying to run Linux systems.
Thought be warned, ARM architecture is not compatible with x86. I tried this on an AWS EC2 instance and it's no good.
Docker Hub
Docker Hub is the GitHub equivalent for Docker. They let you create Docker repositories (that are images) and lets you push and pull to a central location. To push and pull you need to make an account, docker login, and then you can push and pull your custom repositories with repo name. For example, for this Docker Repository these are the commands I executed, which are building the image, pushing the image, removing that image I just built, and then later pulling it.
sudo docker login
sudo docker build -t kevthatdevs/advanced-express-docker
sudo docker push kevthatdevs/advanced-express-docker:latest
sudo docker rmi kevthatdevs/advanced-express-docker
sudo docker pull kevthatdevs/advanced-express-docker
Seeing what gets sent to Daemon
One time while pushing one of my applications to Docker I saw that over 700 MB was being sent to the Docker Daemon.

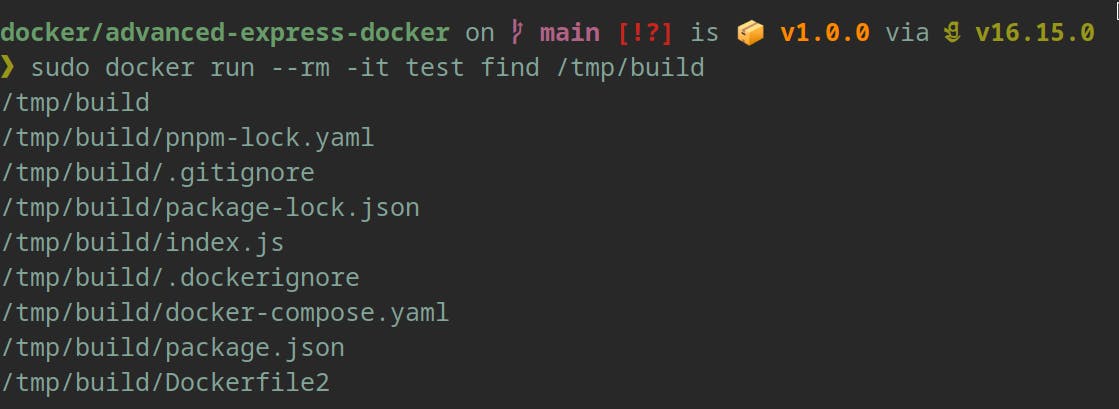
The Docker Daemon is an intermediary location that receives all of your files. Note that files that are .dockerignore, like node_modules they should not be sent to the Docker Daemon. However I was sending over 700 MB of data over so I thought I was not properly .dockerignore-ing enough files. To check what I was sending to the Daemon I built out this temporary Dockerfile (renamed my original one to Dockerfile2 and used this as my Dockerfile)
FROM busybox

RUN mkdir /tmp/build/
# Add context to /tmp/build/
COPY . /tmp/build/
Then I built the Docker Image with
sudo docker build -t test .
Then I run the command
sudo docker run --rm -it test find /tmp/build

Here this runs the image we just created called "test", prints out in the console the files that were sent over to the Daemon and then removes the image after it runs. Notice here that node_modules and Dockerfile are not sent since they are in the .dockerignore.
Props to this StackOverflow post that helped me with this one!
Tune in soon to the next installment of this series where I go through this tech stack [React, Remix, NodeJS Express, Prisma, PostgreSQL, Docker, and AWS].
Docker Cheat Sheet (Combined)
sudo docker compose -f docker-compose.yaml up -d to Docker Compose Up from your docker-compose.yaml
- Add the --build flag if you made changes to your Dockerfile
sudo docker compose down to Docker Compose down
sudo docker exec -it advanced-express-docker_node-app-1 bash to launch an interactive bash terminal in your container
sudo docker run -v "$(pwd):/app:ro" -p 4000:3000 -d --name node-express-container advanced-express-docker_node-app to volume bind your next running container
sudo docker login
sudo docker build -t kevthatdevs/advanced-express-docker
sudo docker push kevthatdevs/advanced-express-docker:latest
sudo docker rmi kevthatdevs/advanced-express-docker
sudo docker pull kevthatdevs/advanced-express-docker
A general Docker Hub flow
From Last Post:
sudo docker build -t <image-name> . to build Docker Images
sudo docker images to get a list of Docker Images
sudo docker run -p <incoming port>:<exposed port> -d --name <container-name> <image-name> to run a Docker Container
sudo docker ps to get a list of active Docker Containers
sudo docker rm <container-name> -f to forcefully remove a Docker Container
sudo docker rmi <image-name> to remove a Docker Image
![Advanced Docker [Docker Compose, Docker Run Flags, Docker Exec, Docker Hub, and Tips and Tricks]](https://cdn.hashnode.com/res/hashnode/image/upload/v1653521984128/fPTwjPgV7.jpg?w=1600&h=840&fit=crop&crop=entropy&auto=compress,format&format=webp)